Why Is My Spray Nozzle Not Working?
When a spray nozzle stops working, the cause is often smaller than the symptom. A dry trigger, weak spray, or uneven fan can indicate different failures. In field maintenance, I have seen operators blame the pump before checking the nozzle filter. That shortcut wastes time. Sometimes, the blockage appears as a crust around the tip. More often, residue sits inside the orifice, while a worn seal allows pressure to escape. Fluid temperature, viscosity, inlet pressure, and chemical compatibility also matter. A nozzle may look clean and still perform badly.
Industry evidence supports careful diagnosis. The FAO AQUASTAT data platform reports that agriculture accounts for roughly 70% of global freshwater withdrawals. Therefore, spray efficiency is more than a minor maintenance issue. The U.S. Environmental Protection Agency’s WaterSense guidance also connects efficient water use with properly maintained delivery equipment. ISO 5682-1 provides test methods for agricultural hydraulic sprayers, emphasizing flow, pressure, and spray-pattern testing. Appearance alone is not enough. Manufacturer service guidance commonly recommends comparing measured output with the nozzle’s rated flow. Yet one detail is easy to overlook: the pressure gauge itself may be inaccurate. Check the filter, hose, seal, pump, and fluid conditions in sequence. Do not force a blocked tip with wire. It can permanently change the orifice. This guide explains why a spray nozzle fails, how to test it safely, and when replacement is more reliable than cleaning. The first diagnosis may be wrong. Record each change, measure again, and let evidence—not guesswork—guide the repair.
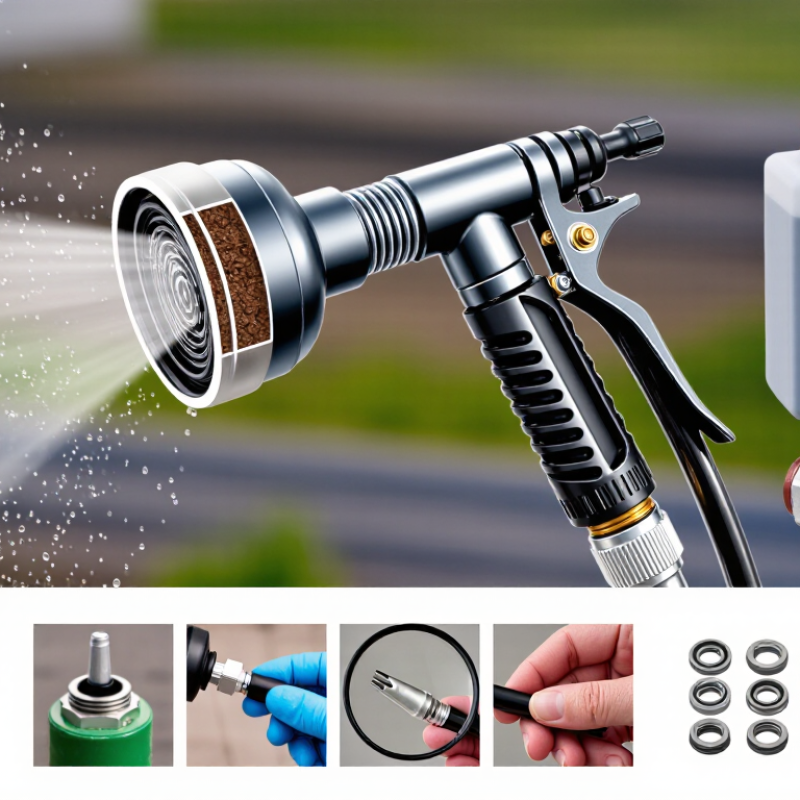
What a Spray Nozzle Does and Why It May Stop Working
A spray nozzle converts liquid pressure into a controlled mist, stream, or fan-shaped spray. When it works properly, the nozzle opening, internal valve, dip tube, and trigger must work together. A blocked opening is common, especially after liquid dries around the tip. The liquid may contain particles, or the nozzle may draw air through a loose connection. Sometimes the problem is inside the bottle. A cracked dip tube can leave the trigger feeling normal while no liquid reaches the nozzle.
Check the nozzle closely. Dried residue may look like a thin white ring or a sticky film. Remove the nozzle, rinse it with warm water, and brush the opening gently with a soft toothbrush. Avoid needles or metal tools because they can damage the orifice and change the spray pattern. I have seen a nozzle improve after cleaning, then fail again because the dip tube still held thick residue. That small detail is easy to miss. Test the sprayer with clean water if the liquid is safe to handle. If the trigger feels unusually loose, inspect the seal and tube connection. Do not force a jammed mechanism.
Tips: Keep the bottle upright during use. Wipe the nozzle after spraying. Store it away from direct heat. Do not mix cleaning liquids during testing. If rinsing, brushing, and checking the tube do not help, replace the damaged part with a compatible one. Some failures are internal and cannot be fixed reliably at home.
Why Is My Spray Nozzle Not Working?
A spray nozzle converts liquid pressure into a controlled spray pattern. When the nozzle stops working, the most common causes are blocked openings, insufficient pressure, air leaks, worn components, or an empty supply.
Common Troubleshooting Causes
Start by checking the nozzle opening for dried residue or debris. Then verify liquid level, pump pressure, hose connections, filters, and seals. A worn nozzle may produce an uneven pattern even when the system pressure is correct.
How to Identify the Main Cause of a Faulty Spray Nozzle
Why Is My Spray Nozzle Not Working?
How to Identify the Main Cause of a Faulty Spray Nozzle
A faulty spray nozzle often has a simple cause. Dried liquid may block the small outlet, especially after several days of storage. Look for crust, uneven spray, or a weak stream. Remove the nozzle only if the container instructions allow it. Rinse the removable part with warm water, then clear the opening gently with a soft brush. Avoid using needles, which can damage the spray pattern.
Air problems are also common. Check whether the dip tube is loose, cracked, or sitting above the liquid level. A bottle may feel full but still fail to draw fluid. Press the actuator several times while holding the container upright. If the pump feels unusually soft, inspect the seal around the neck. Even a small gap can prevent pressure from building.
I have sometimes blamed the nozzle too quickly. The liquid itself may be too thick, partly frozen, or contaminated with particles. Test the sprayer with clean water when practical, but do not mix unknown substances. If water sprays normally, the original liquid may need filtering or temperature adjustment. If nothing changes, replace the damaged pump or seek advice from a qualified technician. Stop using the container if it leaks, swells, or shows visible damage.
How to Clean and Unclog a Blocked Spray Nozzle
Why Is My Spray Nozzle Not Working?
How to Clean and Unclog a Blocked Spray Nozzle
A spray nozzle often stops working because dried liquid has sealed the tiny opening. Dust, residue, and trapped air can create the same problem. I once assumed an empty container was defective, but the nozzle was simply blocked. Remove the nozzle gently, if the container allows it, and rinse it under warm water. Do not use boiling water, which may damage plastic parts or create pressure risks.
Soak the removable nozzle in warm water for ten to fifteen minutes. Then wipe the opening with a soft cloth or a clean, fine brush. Avoid forcing a pin deep inside. It can widen the opening and permanently change the spray pattern. After cleaning, shake away excess water and let the part dry fully. A damp nozzle may dilute the product or cause another blockage.
Reattach the nozzle and test it with short presses. Aim away from your face and keep the container upright. If the spray remains weak, check whether the tube inside is loose, bent, or submerged below the liquid. Pressurized containers should never be pierced, heated, or taken apart. Sometimes, cleaning helps only briefly. That usually means residue remains inside the valve or the container has lost pressure. I have learned not to keep forcing the actuator; patience works better than strength. If the nozzle still fails after careful cleaning, replace the damaged part or follow the container’s safety instructions.
How to Check the Container, Tube, and Internal Mechanism
Why Is My Spray Nozzle Not Working?
When a spray nozzle stops working, avoid pressing it repeatedly. Extra force can damage the pump or loosen the tube. Hold the container upright and inspect its liquid level. A nearly empty container may draw air instead of fluid. Check the cap, neck, and threads for cracks, leaks, or poor alignment. Even a small gap can prevent proper pressure.
Remove the tube only if the container instructions allow it. Look for bends, splits, or a tube that has slipped above the liquid. The tube should reach near the bottom without pressing tightly against it. Rinse the tube with warm water when the formula is water-compatible. A soft stream can remove dried residue. Do not use a needle, because it may widen the opening and create an uneven spray. I have found that a short soak works better than aggressive scraping.
The internal mechanism may also be blocked. Pump the nozzle several times after cleaning, keeping the opening pointed away from your face. Notice whether the button feels firm, loose, or unusually soft. A loose button can indicate a disconnected stem, while a stiff button may point to residue around the spring or piston. Check the small opening for buildup and wipe it gently. If the pump remains silent or the container leaks around the neck, replacement is usually more reliable than forcing the mechanism. I once blamed the nozzle, but the real problem was a cracked tube. Small parts can mislead you.
When to Repair or Replace a Nonworking Spray Nozzle
Why Is My Spray Nozzle Not Working?
When to Repair or Replace a Nonworking Spray Nozzle
A silent spray nozzle often has a simple cause. Dried liquid may block the tiny opening, or the filter may be clogged. Turn off the pressure before checking it. Remove the nozzle and rinse it with clean water. Use a soft brush, not a sharp pin, because metal can widen the opening. Check the trigger, seal, and connection for cracks or looseness. A nozzle that sprays unevenly may only need cleaning.
Repair makes sense when the body is intact and replacement parts are available. A worn seal can often be changed in minutes. A damaged spring may also cause weak or delayed spraying. Test the nozzle with clean water after reassembly. Watch for leaks around the threads. One overlooked detail is the gasket. I have seen a clean nozzle fail because its gasket was flattened. That small mistake matters.
Replacement is safer when the nozzle has a split body, severe corrosion, or a permanently distorted opening. Replace it when cleaning does not restore a steady pattern. Continued leaks can waste liquid and create slippery surfaces. Do not force blocked parts or increase pressure to compensate. The correct replacement must match the hose, pressure range, and liquid type. Check the manufacturer’s specifications or ask a qualified technician. I sometimes replace a questionable nozzle too quickly, but repeated failures usually reveal deeper wear.